How to fix basic dyes on materials?
Leave a message

Hey there! As a supplier of basic dyes, I've seen firsthand how these vibrant colors can transform materials. But getting those basic dyes to stick properly on materials can be a bit of a challenge. In this blog post, I'm gonna share some tips on how to fix basic dyes on materials effectively.
Understanding Basic Dyes
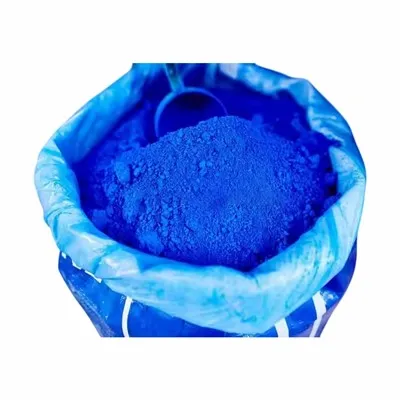
First things first, let's talk a bit about basic dyes. Basic dyes are cationic in nature, which means they have a positive charge. This positive charge allows them to bond well with materials that have a negative charge, like animal fibers (wool, silk) and some synthetic fibers. They're known for their bright and intense colors, making them a popular choice in many industries, from textiles to paper and even inks.
Pre - treatment of Materials
Before you start dyeing, it's crucial to pre - treat the materials. This step helps to clean the material and prepare its surface for better dye absorption.
Cleaning
Dirt, oils, and other contaminants on the material can prevent the dye from adhering properly. For natural fibers like wool and silk, you can use a mild detergent. Just soak the material in a solution of warm water and detergent for about 15 - 20 minutes, then rinse it thoroughly with clean water. For synthetic fibers, a specialized fiber cleaner might be needed. Make sure to follow the manufacturer's instructions.
Mordanting
Mordanting is a process where you use a mordant, a substance that helps the dye to bond with the material. Some common mordants for basic dyes include tannic acid and alum.


For tannic acid, you can make a solution by dissolving about 5 - 10 grams of tannic acid per liter of water. Soak the material in this solution for about an hour at a temperature of around 60 - 70°C. After that, rinse the material well. Then, you can soak it in an alum solution (about 10 - 15 grams of alum per liter of water) for another hour at a similar temperature. This two - step mordanting process can significantly improve the dye fixation.
Dyeing Process
Now that your material is pre - treated, it's time to start dyeing.
Dye Solution Preparation
Start by dissolving the basic dye in hot water. The amount of dye you use depends on how intense you want the color to be. As a general rule, for a light color, you might use about 0.1 - 0.5 grams of dye per liter of water, and for a darker color, 1 - 5 grams per liter. Stir the dye solution well until the dye is completely dissolved. You can use a magnetic stirrer or just a regular spoon, but make sure there are no lumps.
Dyeing the Material
Immerse the pre - treated material into the dye solution. You can use a dye bath, which can be a simple plastic container or a more professional dyeing machine. Keep the temperature of the dye bath around 60 - 80°C. Stir the material gently in the dye bath for about 30 minutes to an hour. This helps the dye to evenly distribute on the material.
If you're dyeing multiple pieces of material, make sure to leave enough space between them so that the dye can reach all parts of the material.
Fixing the Dye
After dyeing, you need to fix the dye on the material to make sure it doesn't fade easily.
Acid Treatment
One common way to fix basic dyes is by using an acid. Acetic acid is a popular choice. Prepare a solution of about 1 - 2% acetic acid in water. After dyeing, take the material out of the dye bath and rinse it briefly with cold water. Then, immerse it in the acetic acid solution for about 15 - 20 minutes. The acid helps to neutralize the positive charge of the basic dye and make it more stable on the material.
Heat Treatment
Heat can also help to fix the dye. You can use an oven or a steam iron. If using an oven, set the temperature to around 100 - 120°C and place the dyed material inside for about 15 - 20 minutes. Make sure to spread the material out evenly so that it heats up uniformly. If using a steam iron, gently press the iron on the material for a few seconds at a time, moving it around to cover the whole area.
Post - treatment
Once the dye is fixed, there are a few post - treatment steps you can take to ensure the longevity of the color.
Rinsing
Rinse the material thoroughly with cold water to remove any excess dye or chemicals. Keep rinsing until the water runs clear. This step is important to prevent the dye from bleeding when the material is washed later.
Drying
After rinsing, gently squeeze out the excess water from the material. Don't wring it too hard, as this can damage the fibers. Then, hang the material to dry in a well - ventilated area away from direct sunlight. Sunlight can cause the color to fade over time.
Specific Examples of Basic Dyes
Let's take a look at some specific basic dyes and how they can be used. Basic Blue9 is a very popular basic dye. It gives a beautiful blue color to materials. When using Basic Blue9, follow the same pre - treatment, dyeing, and fixing steps as mentioned above. It works well on wool and silk, giving a bright and long - lasting blue color.
Another great option is Basic Blue7. This dye has a slightly different shade of blue and is also known for its good colorfastness. It can be used on a variety of materials, including some synthetic fibers. Just make sure to adjust the dyeing and fixing process according to the type of material you're using.
Conclusion
Fixing basic dyes on materials doesn't have to be a headache. By following these steps of pre - treatment, proper dyeing, fixing, and post - treatment, you can achieve great results. Whether you're a small - scale crafter or a large - scale manufacturer, these tips can help you get the most out of your basic dyes.
If you're interested in purchasing high - quality basic dyes for your projects, feel free to reach out. We have a wide range of basic dyes available, and our team can provide you with more detailed information and support. Let's start creating beautiful, long - lasting colors together!
References
- "Textile Dyeing and Finishing" by Peter Christie
- "The Chemistry of Synthetic Dyes" by K. Venkataraman